DIY Fruit Fly Trap

fruitflytrap.jpg

Fruit Flies. I like to believe that I can live up to my hippie-dippy ideals of loving all living things, but fruit flies remind me that I am not perfect in this sense. These little buggers have been driving me up a wall this summer!

So I have found that by reducing plastic and other forms of waste, almost everything that I throw away is food waste/compost materials.  This means that our trash attracts and produces fruit flies a wee bit faster than the average.

Part of combating these tiny guys has been keeping our sink clean of dishes (we don't always succeed there...). But we have given in to the fact that they are here until it gets frosty enough to take them out. However, we still like to keep their numbers down and catch them as opposed to having them flying around our kitchen. 

Enter, the fruit fly trap. 

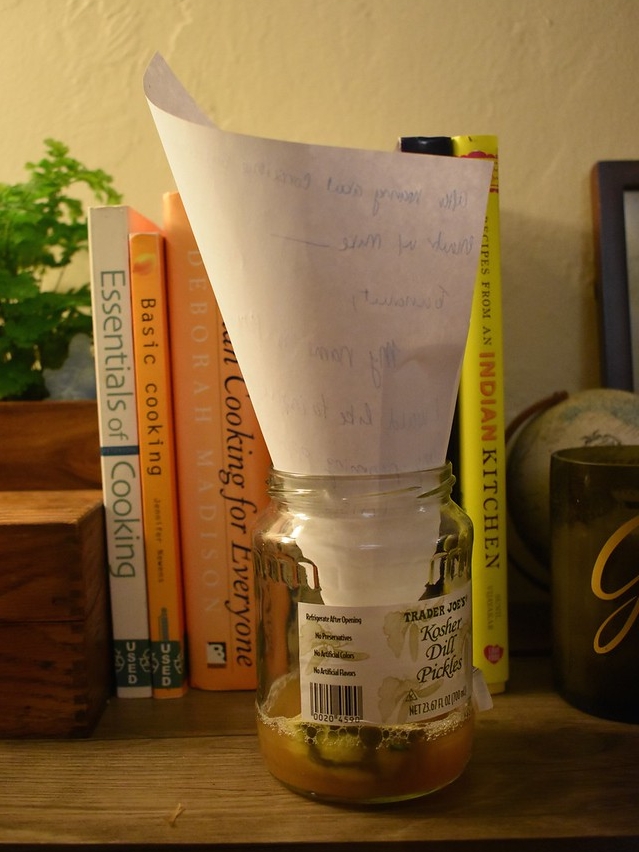
This has been really effective in taking out lots of fruit flies at a time. After 24 hours of having a trap out, most of the flies in the kitchen are in there. I have on by my kitchen window, on the windowsill holding my herbs, and by our fruit bowl (not in our kitchen because we don't really have any counter space).

Materials

1. Old jar - ones with a smaller mouth tend to work a little better

2. Apple Cider Vinegar

3. Several drops of dish soap

4. Old piece of fruit - I have found citrus fruits to work best

5. Piece of scrap paper / old newspaper

Instructions

1. Pour apple cider vinegar into jar so that there is about 1 inch of vinegar

2. Squeeze 3-5 drops of dishsoap into the vinegar. This breaks the surface tension of the water so that the flies get trapped in the solution.

3. Place the old piece of fruit into the vinegar

4. Curl up the piece of paper so you create a funnel entering the jar. The fruit flies fly down the funnel, but can't find their way out, so even if they don't get trapped in the solution they get trapped at the edges of the jar.

5. Place in an area where you have a fruit fly problem and let nature run its course. 

You'll need to refill the trap every few weeks, depending on how fast the vinegar evaporates.



Zero Waste Hair

photo-1458594468546-902ea1ef951e.jpeg

If you want to take a very literal "top down" approach to going zero waste, then starting with the hair on your head seems like a great option! 

1. The Clean

How do you wash and condition you hair? There are way too many products you can purchase today for hair care, and many come packaged in plastic and contain harsh chemicals that act as carcinogens and endocrine disruptors, not to mention damaging to the water supply. 

So if you want to go the zero waste route as far as your hair washing routine goes, you have a few options.

No Poo

The "no poo" option is honestly the best, since you are pretty much using nothing, but this did not go so well for me. My hair became very greasy and I couldn't alleviate it after about a month of effort.   However, Paris To Go had a completely different experience, so if you are interested in this route, checkout her story on it here. I think if I lived by an ocean I could maybe pull it off, but alas.

Homemade

After "no poo" we have homemade shampoo. I did this with baking soda and vinegar with great success! I loved my hair on the homemade stuff. I only switched because I got some mermaid color added to my hair, and baking soda will strip this out.

So if you can't get the no poo going, try transitioning to the homemade stuff!

Shampoo Bars and Solid Conditioner

This is the closest to the norm you can get while still staying zero waste, you just need to find the naturally made stuff. Here in Colorado there's a few local soap companies that make shampoo bars like Summit Soap & Company and Tellicherry Trading Co. It's totally worth checking out local soap makers to see if their products work well for you. 

A more widely available brand for these products is Lush. They are an amazing company for almost any zero waste body product you could think of! And they absolutely have the widest variety of shampoo bars on the market.  So no matter whats going on with your hair: it's dry, it's greasy, it's brittle, it's thin, it's thick, it's colored, Lush will have something for you!

If you're really feeling ambitious, you can make your own shampoo bar! I haven't tried this yet but I'd recommend this recipe if you want to give it a go!

NonToxic with Eco-Friendly Packaging

Plaine Products are nontoxic, biodegradable, paraben-free, sulfate-free, and color-safe. Though their products are packaged, they have a unique program where the bottles are returnable, refillable and reusable.  So you can send in your used bottles and they sanitize, refill, and send them back to you.

I have not personally tried these, but they are recommended by Kathryn of Going Zero Waste, who's opinion I trust.

photo-1467912792734-622b2281c4f2-1.jpeg

2. The UpDo

When it comes to doing my hair, I mostly keep it simple: down, ponytail, bun, or braided. However the thing you need for most of those is a hair tie. Freaking hair ties... 

Almost all hair ties are made of synthetic rubber and polyester, which we know will inevitably breakdown into dreaded microplastics. On top of it all, most them are manufactured in sweatshops, and therefore almost none are fair-trade. So, even if you keep your look simple, there are still some steps to take to keep it zero waste.


Plastic Free Hair ties

Kooshoo's lila hair ties were my zero waste life saver. They're the only plastic-free, biodegradable, ethically made hair ties on the market! You can read my full post on them here.

Here are the details:

  • Made of organic cotton (75% Organic Cotton, 25% Natural Rubber)
  • Ethically dyed, cut and sewn by family businesses in California.
  • Shipped in 100% Recycled and/or Biodegradable packaging

They are significantly more expensive than regular hair ties, but they are also supposed to last up to a year (if you can manage not to lose them) so the price could end up evening out. However, since its under $20, I'd say it's fair to stretch the wallet for this one, given the plastic-free payoff.

Headbands

I. Love. Headbands. They are awesome looking, protect you from the sun, wick your sweat away, keep your hair out of your face, keep your ears warm, the list goes on. They are probably my favorite hair accessory of all time. 

My current stock of headbands are from an assortment of companies: BUFF®, Smartwool®, Headsox®, etc. I actually haven't bought one since going zero waste. But even so I've always preferred natural fibers like wool and cotton. 

I'd say as long as you're buying natural fiber, you're in the clear here, and there are tons of natural fiber headbands available from places like prAna and Etsy

Hair pins, hairsticks, hair combs, ponytail barrette

Ok, cards on the table, I have never once used any of these things. They are way out of my league as far as doing hair goes. However, I have had friends who used some of these frequently and loved them! So if you are interested in trying out these more, um, advanced hair wrangling techniques I would recommend checking out Etsy for them - there are so many pretty options! While I haven't tried any of these some of my favorites just from browsing are: these recycled copper hair pins, these wood hair sticks, and this hair cuff.

Update: one of my cousins is a carpenter and he actually made me a hair pin for Christmas! Doesn't get more zero waste than that! 

Clips, Clasps and Slides

When you need just a little extra assistance holding your hair back you can reach for some blank barrettes made completely from metal, easily findable on Etsy. There are some fair trade clips and barrettes options, like these feather clips, but they tend to be few and far between.


photo-1462307883847-153a447c1131.jpeg

3. The stylE

I've never used a ton of hair styling products. Partially because they're expensive, partially because I wouldn't know what I was doing, and partially because it's just not my style. But if you do, going zero waste shouldn't limit what you can do with your hair, just maybe how you do it. 

Hairspray

Ok, so I haven't developed a homemade hairspray simply because I don't have need for it. But if you use hairspray on a regular basis, I would recommend this recipe from Wellness Mama. It's one of the better ones because it's natural, nontoxic, and keeps indefinitely!

Sea Salt Spray

This is a product I make and use daily. I'm originally from California, after nearly 10 years of being a transplant in Colorado, I miss the soft, beachy waves I could get in the summertime! My sea salt spray adds that wave that I don't otherwise get here in dry CO, and it smells very refreshing!

Heat Protectant 

I also don't use a hairdryer, straightener, or curling iron. But one of the best defenses against heat is natural oils (you can read HSI Professional's post about it here).  You've probably seen tons of hair care products being advertised as containing argan oil, because it's amazing for your hair.  But what you want to use is the real deal: 100% Moroccan Aragon Oil. I'd recommend this brand, but just make sure you get it fair trade!

If you don't want to jump for aragon oil, it's not the only protective oil: avocado oil, grape seed oil, and almond oil are all great heat protectants! Just be sure to use an oil mister to evenly coat your hair. 

4. The Color

I got my hair professionally colored for the first time this year at a Paul Mitchell school.  It definitely produced more waste than I expected, and smelled rather chemically. While I loved having some mermaid hair, I don't think I'll get it done professionally again. 

Natural Colors

Henna Hair Dyes are what Lush offers as a natural, nontoxic hair dye. They are biodegradable, come non-packaged and I've seen some beautiful color come from them! However, you should know that stylists recommend not using any permanent hair dye after using henna. So, just be aware that you won't have as many options to change your hair afterword. 

Loud Colors

There's not a perfect solution for this.  Bold bright colors aren't found readily in nature in a form thats easily/cheaply transferable to your hair. Given that, there are definitely going to be chemicals involved, one way or another. When I mermaided up I went to a Paul Mitchell school, because I wasn't comfortable bleaching my hair, their dyes are at least cruelty free.

Another brand that I have not used, but am interested in trying is Lime Crime. They are recommended by Peta because they are a vegan and cruelty free company. They also use vegetable based dyes. This does not mean they are nontoxic, or chemical free, but they are definitely gentler than most bold colors available. And their packaging is a simple plastic bottle which can be recycled or reused.  

photo-1459350627708-30cff1602fff.jpeg

Summary

In the end, the biggest thing you can do is try to transition to a plastic free and nontoxic hair care regimen. 

Do what you can, as you can.

As with everything zero waste related, this is a transition, but also a great excuse to try some awesome new hair staying methods and/or DIY recipes!

DIY Beeswax Food Wrap

DSC_0105.JPG

Beeswax wraps are the best alternative to plastic wrap and aluminum foil around!  I did this DIY before I had a blog, and therefore did not document it. However, I wanted an extra large wrap, and had some leftover cotton cloth from before, so I had some friends over for a "make and take," and we got to make some for ourselves and as gifts!

Supplies

DSC_0008.JPG

Beeswax

I grate mine, but you could also get pellets (about 0.5 oz. per wrap depending on size). This time I was able to use wax from a friend's hive. The first time I did this I used wax that came unpackaged at Natural Grocers. You can also find beeswax from tons of small honey shops all over the place (like from here or here)!

100% Organic Cotton Fabric

I recommend organic because you will be wrapping and re-wrapping food, and its very easily accessible online or at your local fabric store. GOTS approved is best!

I use a variety of sizes: 8x8 in., 12×12 in., 22×22 in., it all depends on your needs, but definitely cut before you craft!

Cookie Sheet

Fair warning, this sheet will no longer be good for cookies, so use an old one or pop over to Goodwill and grab one just for beeswax purposes.

Paintbrush

Will no longer be good for painting! Only beeswax-related activities. You can get small ones at most hardware stores for a dollar or two.

Cheese Grater

You could fudge the line with this one, but I'd also recommend just using this for beeswax.  I got my super old one at Goodwill for $0.99.

Yarn, Twine, or String

Make a makeshift clothesline to dry the cloths on.

Directions

  1. Preheat oven to 185F.  This low heat melts the wax without burning it, DO NOT put the oven higher, or on broil!
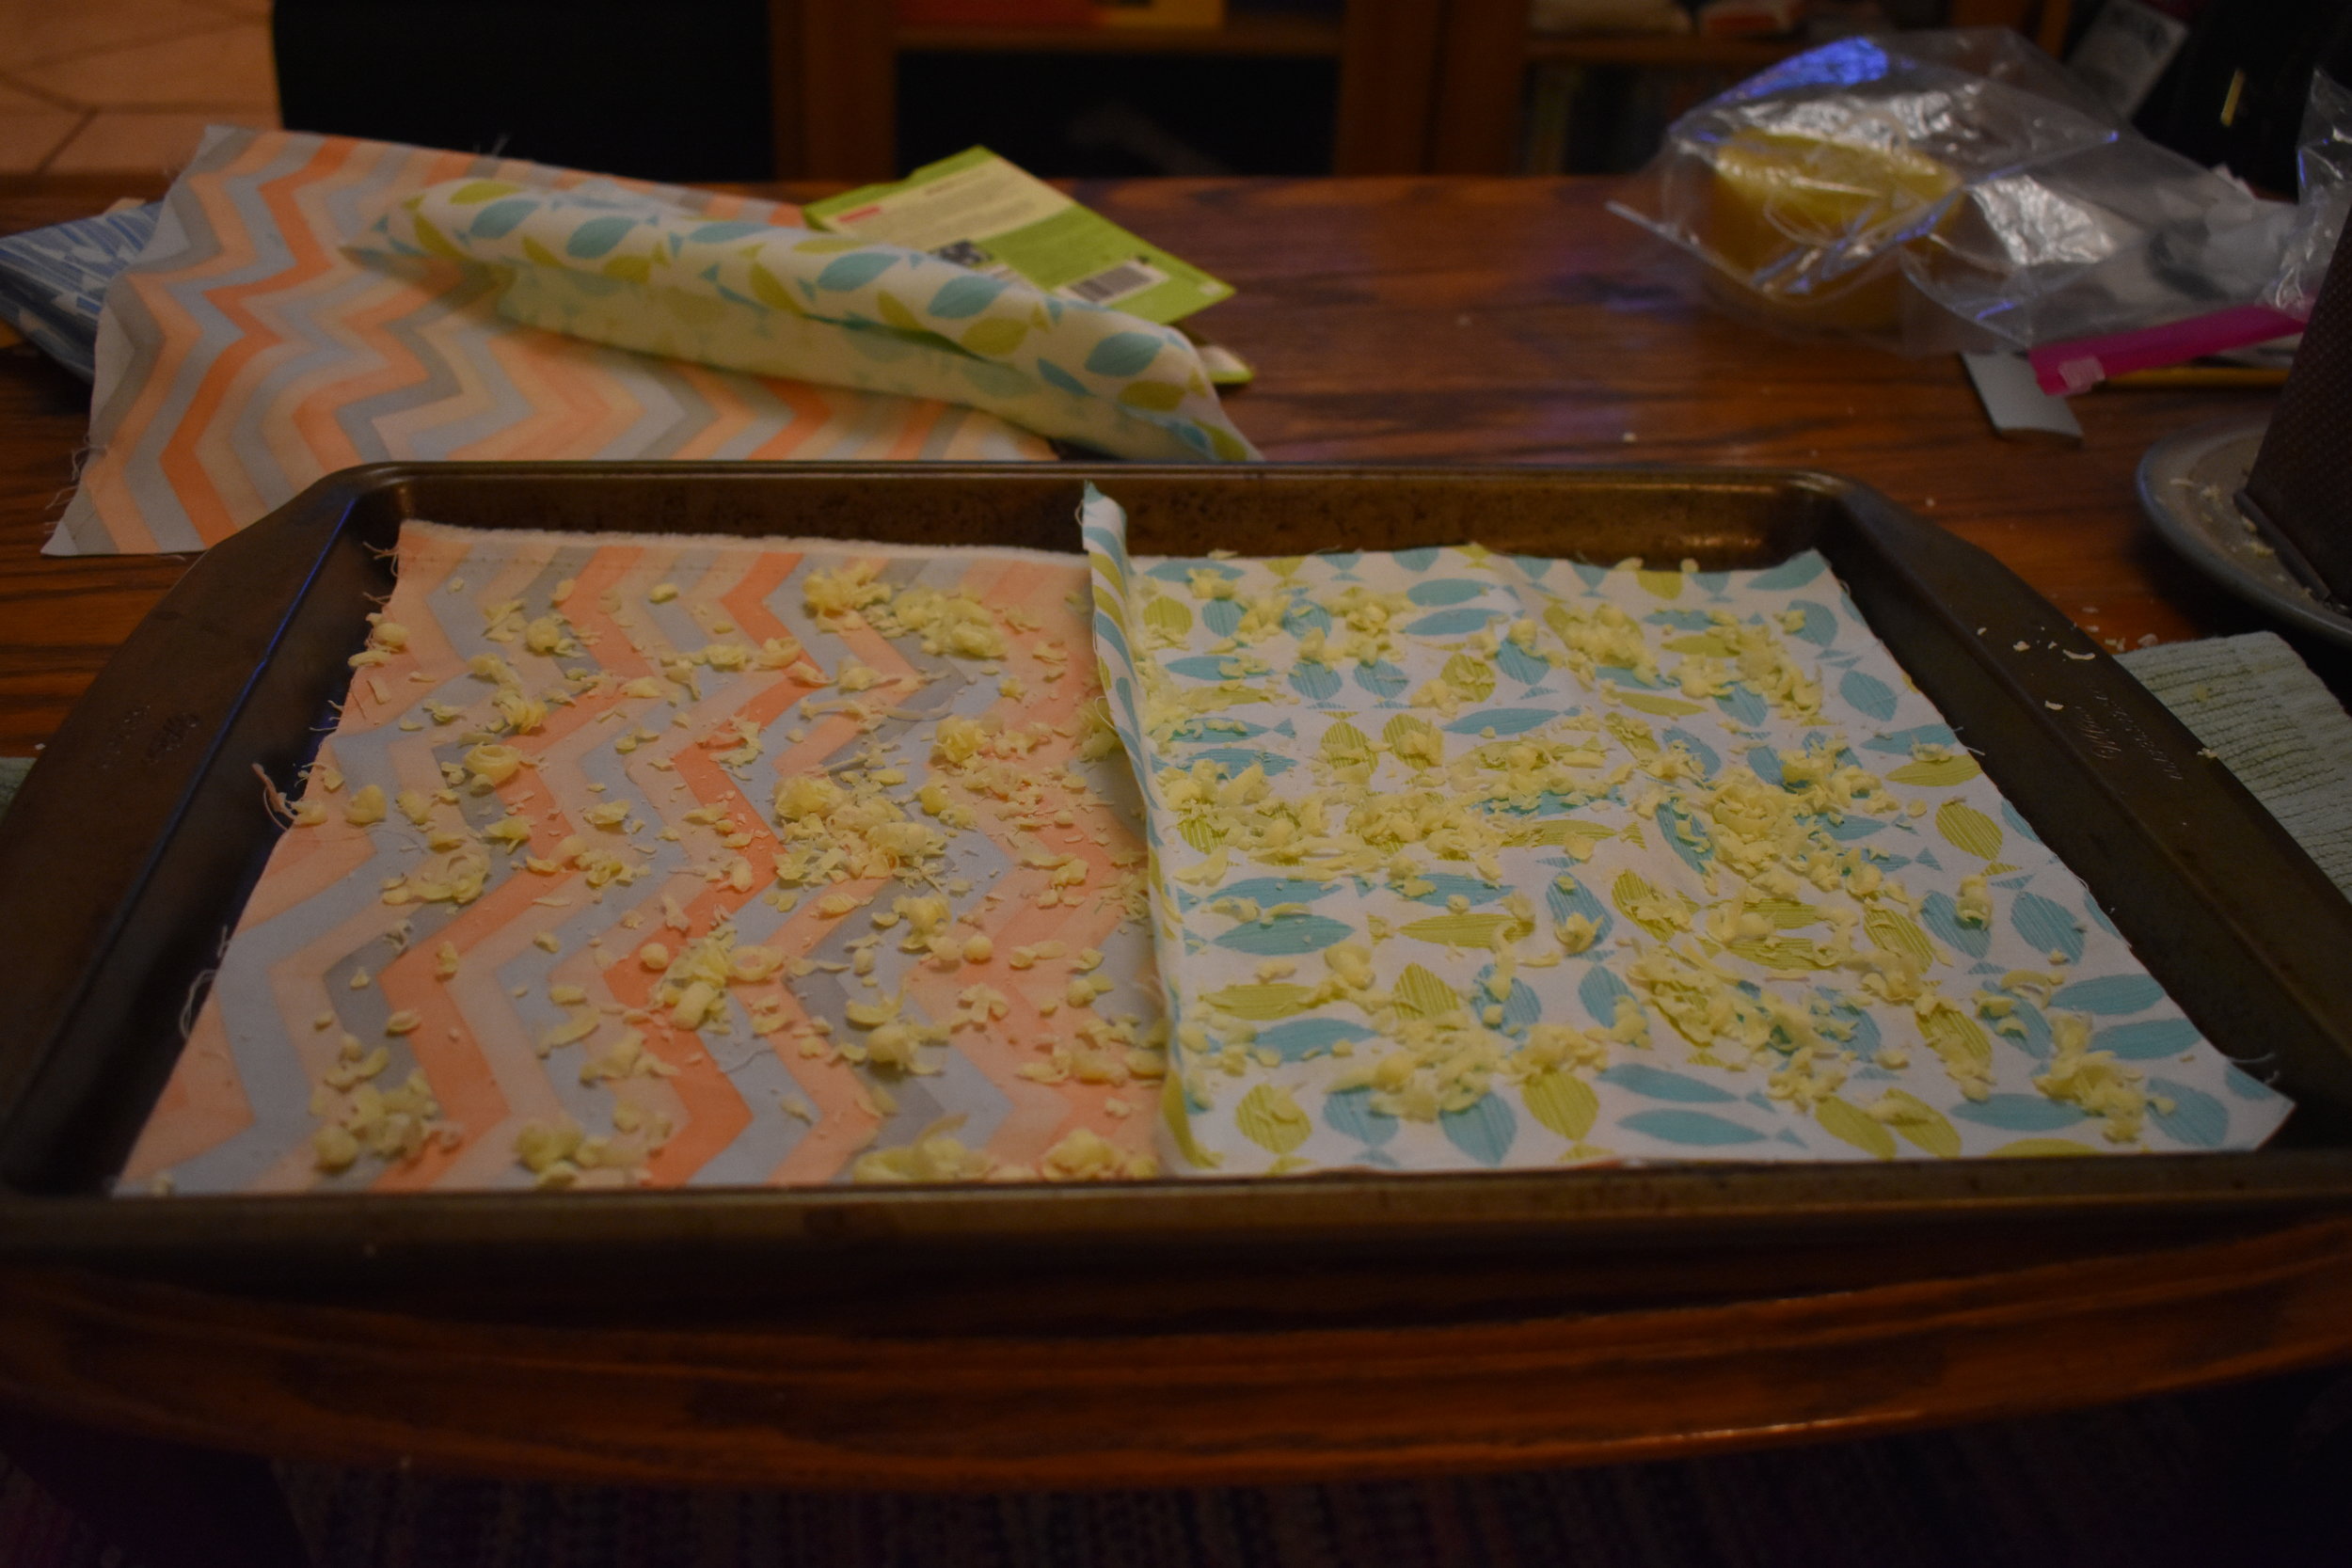
  2. Place your organic cotton fabric on cookie sheet.
  3. Sprinckle your grated beeswax over the fabric.  
  4. Place cookie sheet in the preheated oven for about 5 min.
  5. Once the beeswax has melted, remove from oven.
  6. Brush the paintbrush over the fabric to evenly coat it, and to get any non-coated places. If needed, sprinkle a little more beeswax on a "bald spot" and put back in the oven for a few min.
  7. Hang on your makeshift clothesline to cool/dry (will only take a min or two)

Use and Care

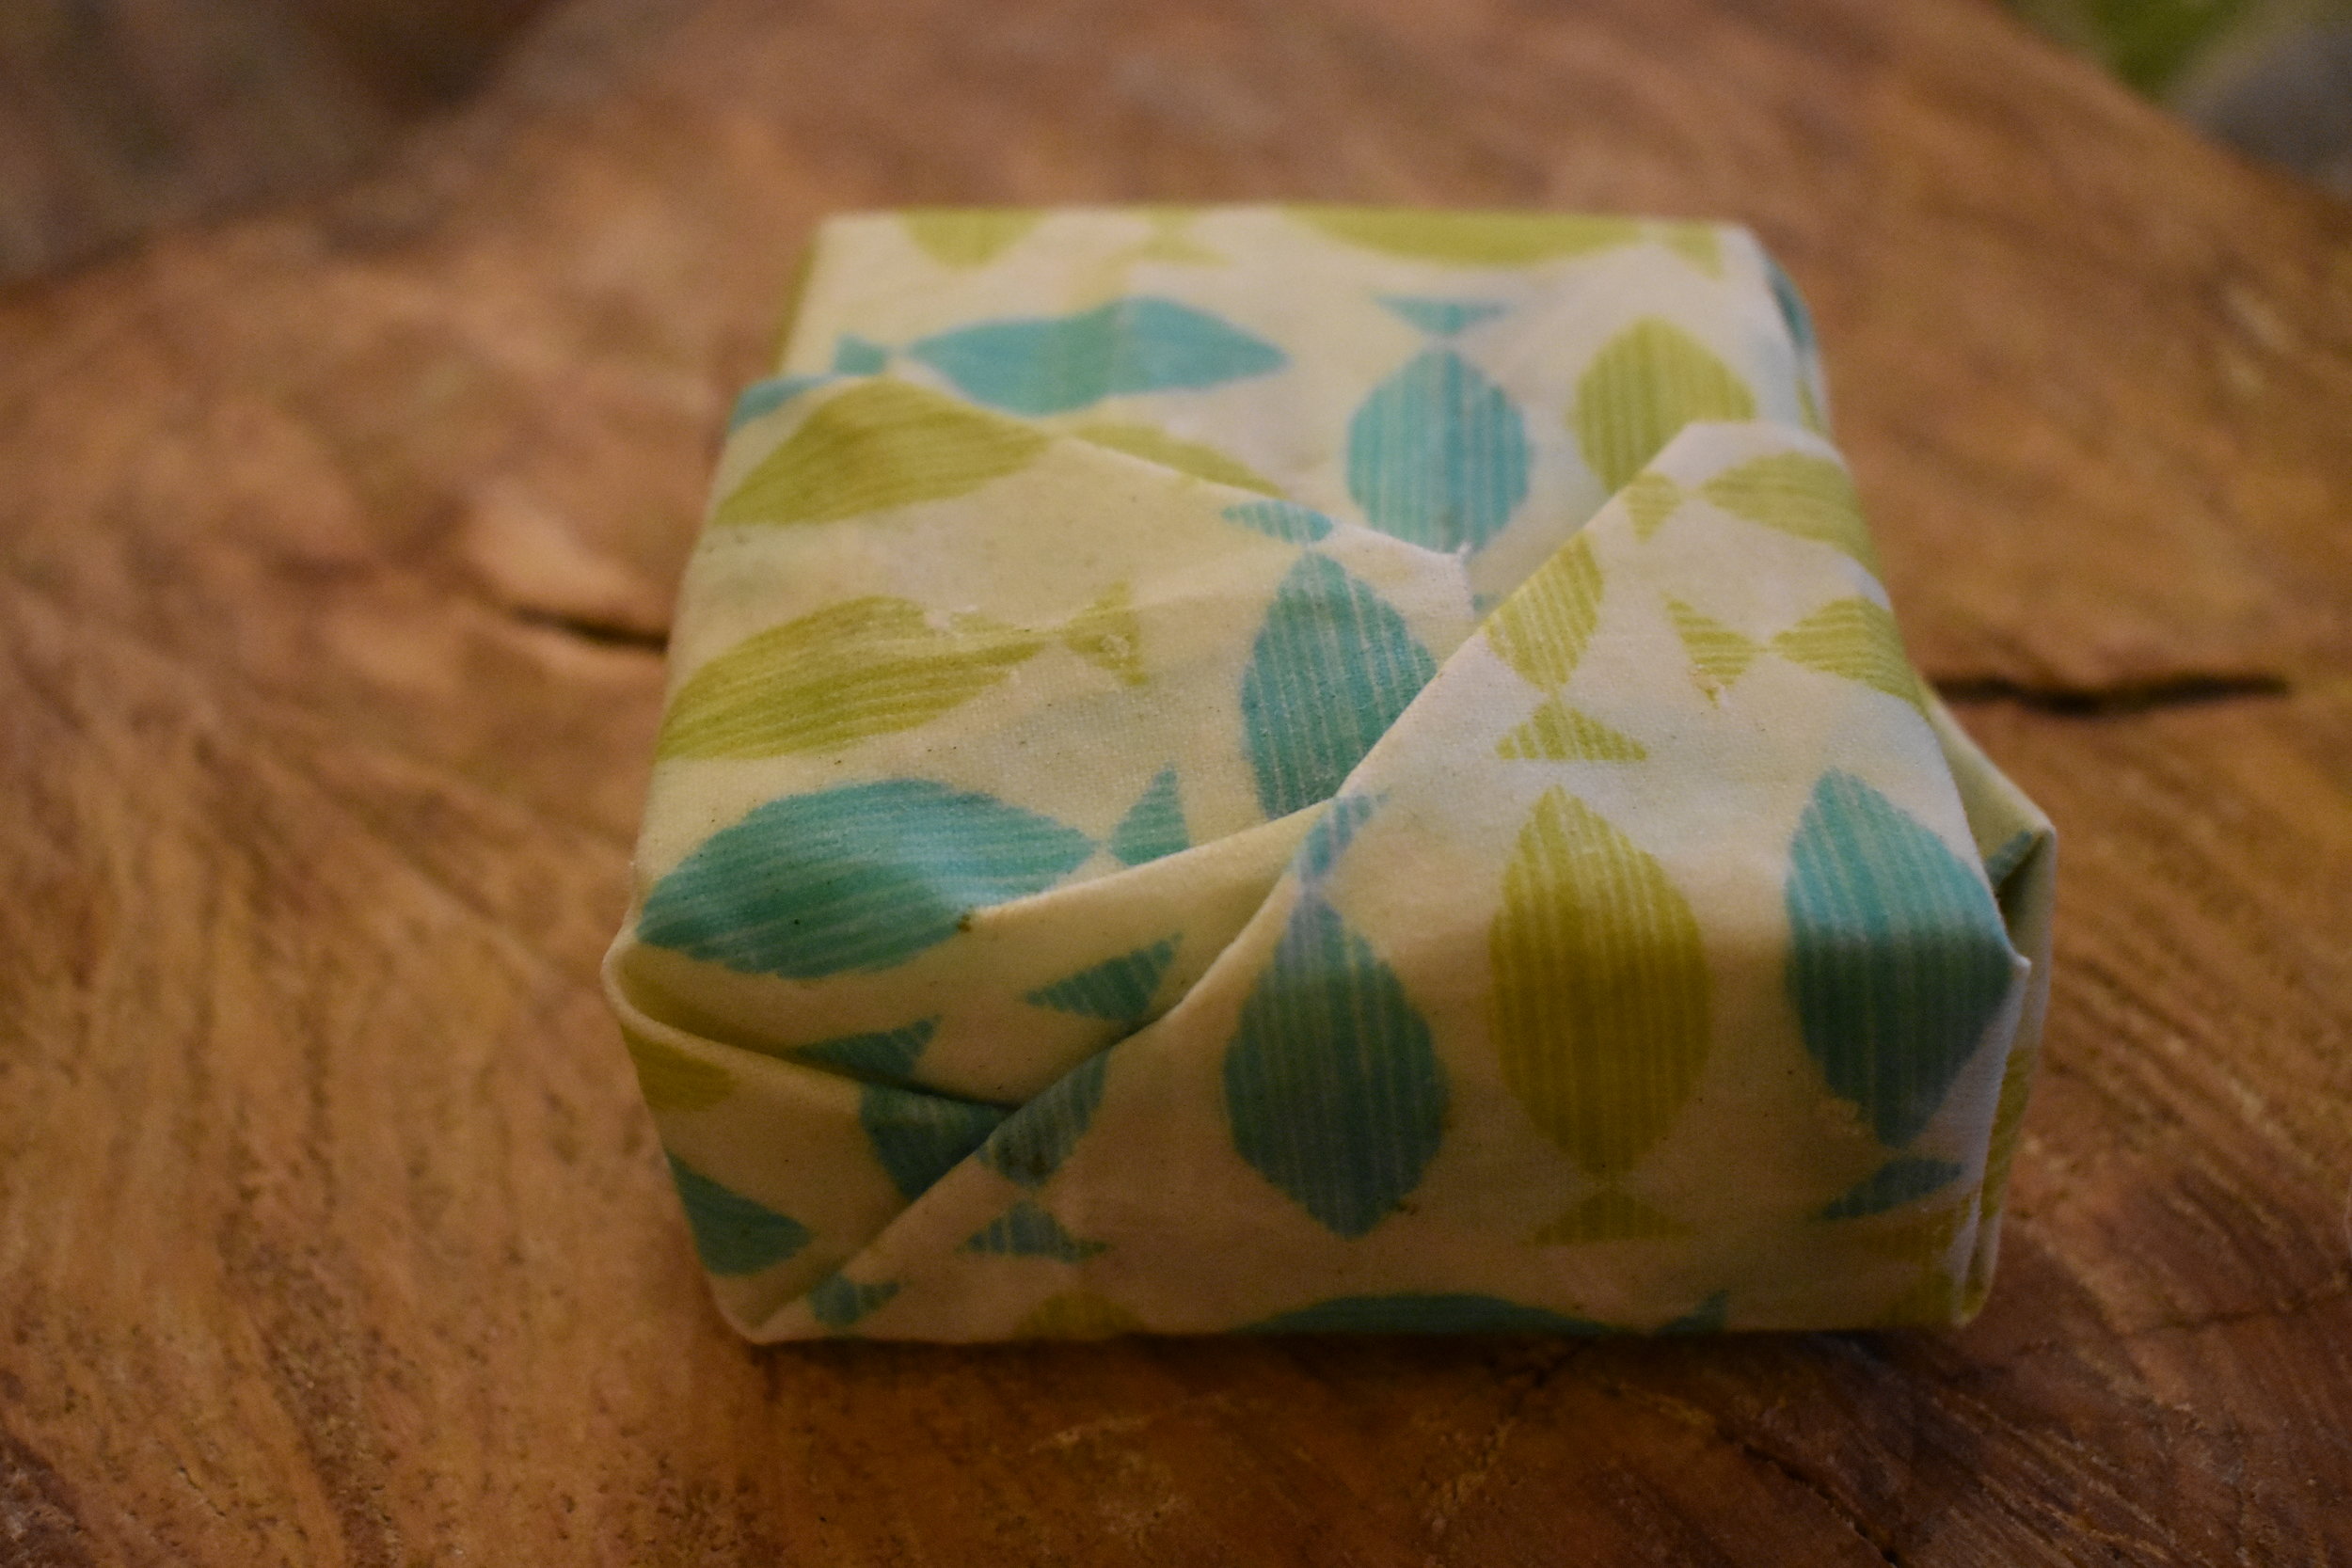
Wrap around your food and seal by folding, with the heat from your hands, rubber bands, or spare string!

Wash in cool water with a mild soap. Liquid castille (like Dr. Bronner's) is fine, but don't use harsh dishwashing detergents.

These wraps can last months to years depending on your use of them! Once they've worn out a bit, you can repeat the waxing process to extend their lives!

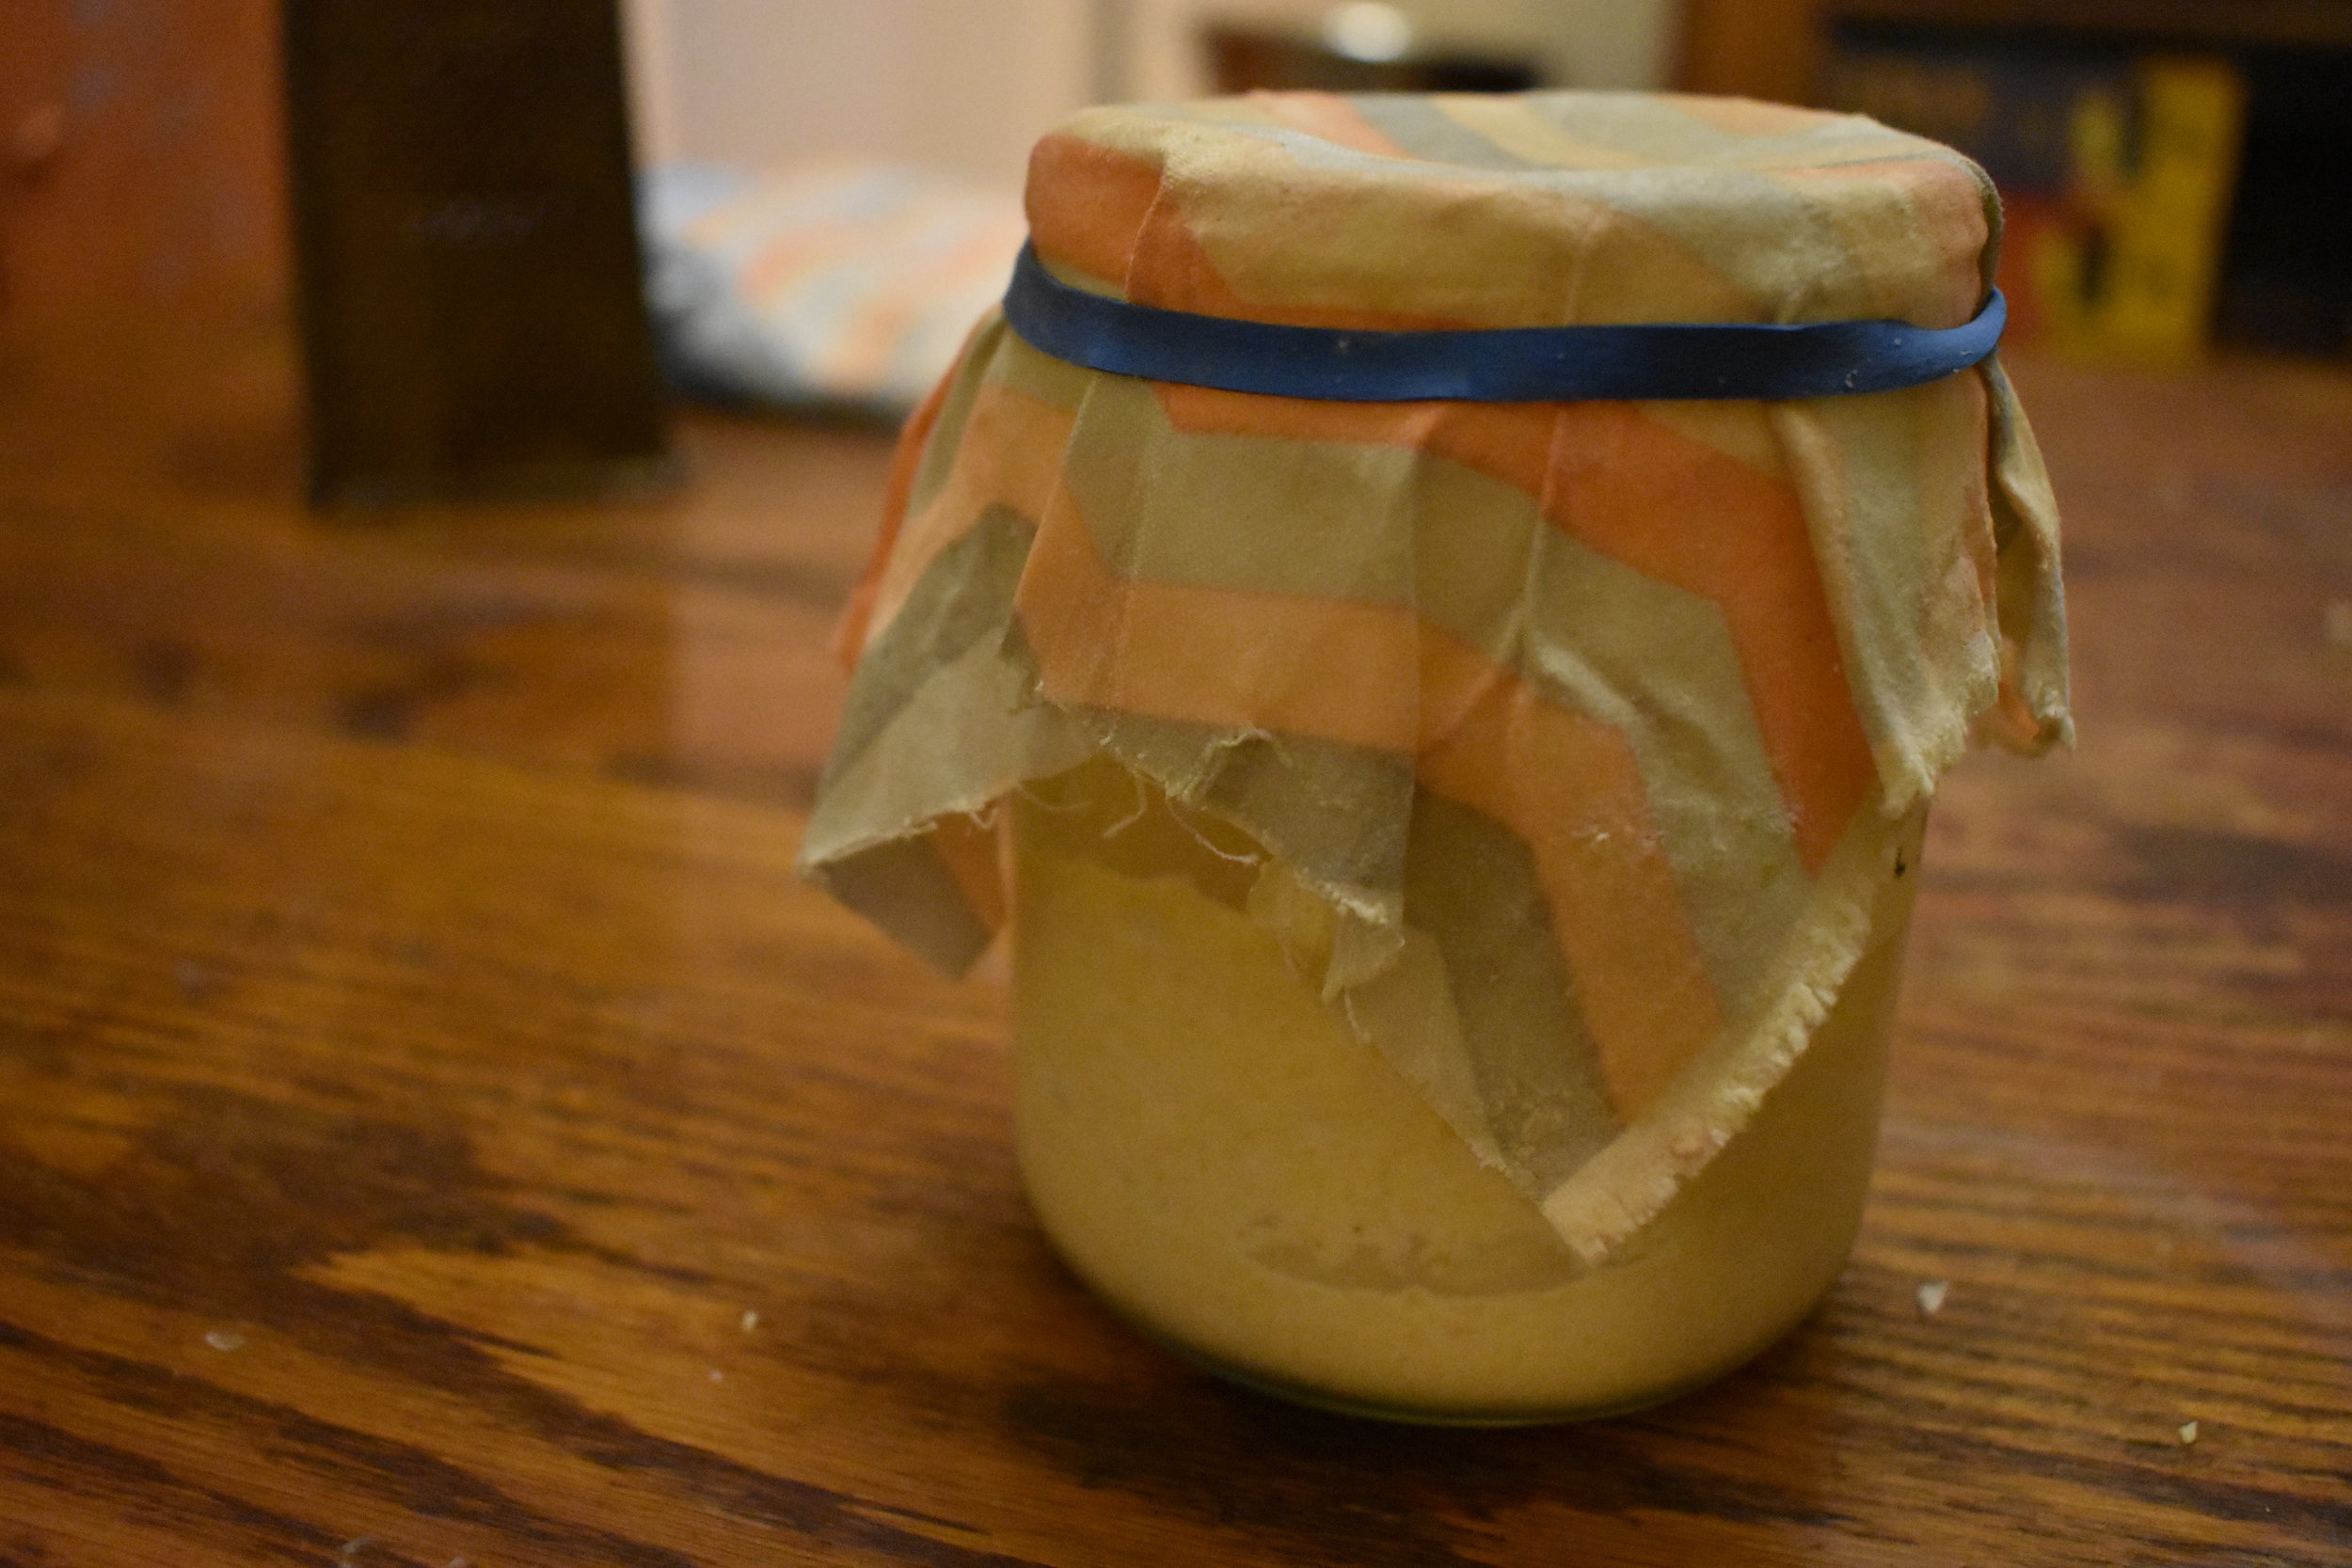
My beeswax wrap covering my sourdough starter.

My beeswax wrap covering my sourdough starter.

notes

There are some DIY's which include Pine Gum Resin and Jojoba Oil in their recipes. This gives the wrap a more sticky grip. However, these often come packaged in plastic, and I have found just plain old beeswax to work just fine! But if you want to give them a try Mommypotamus has a great tutorial!

If you want beeswax wraps, but don't feel like making them. Never fear! Beeswrap is a great brand and there are also some awesome options on Etsy!

The first time I did this project I used the instructions from My Healthy Green Family's DIY!