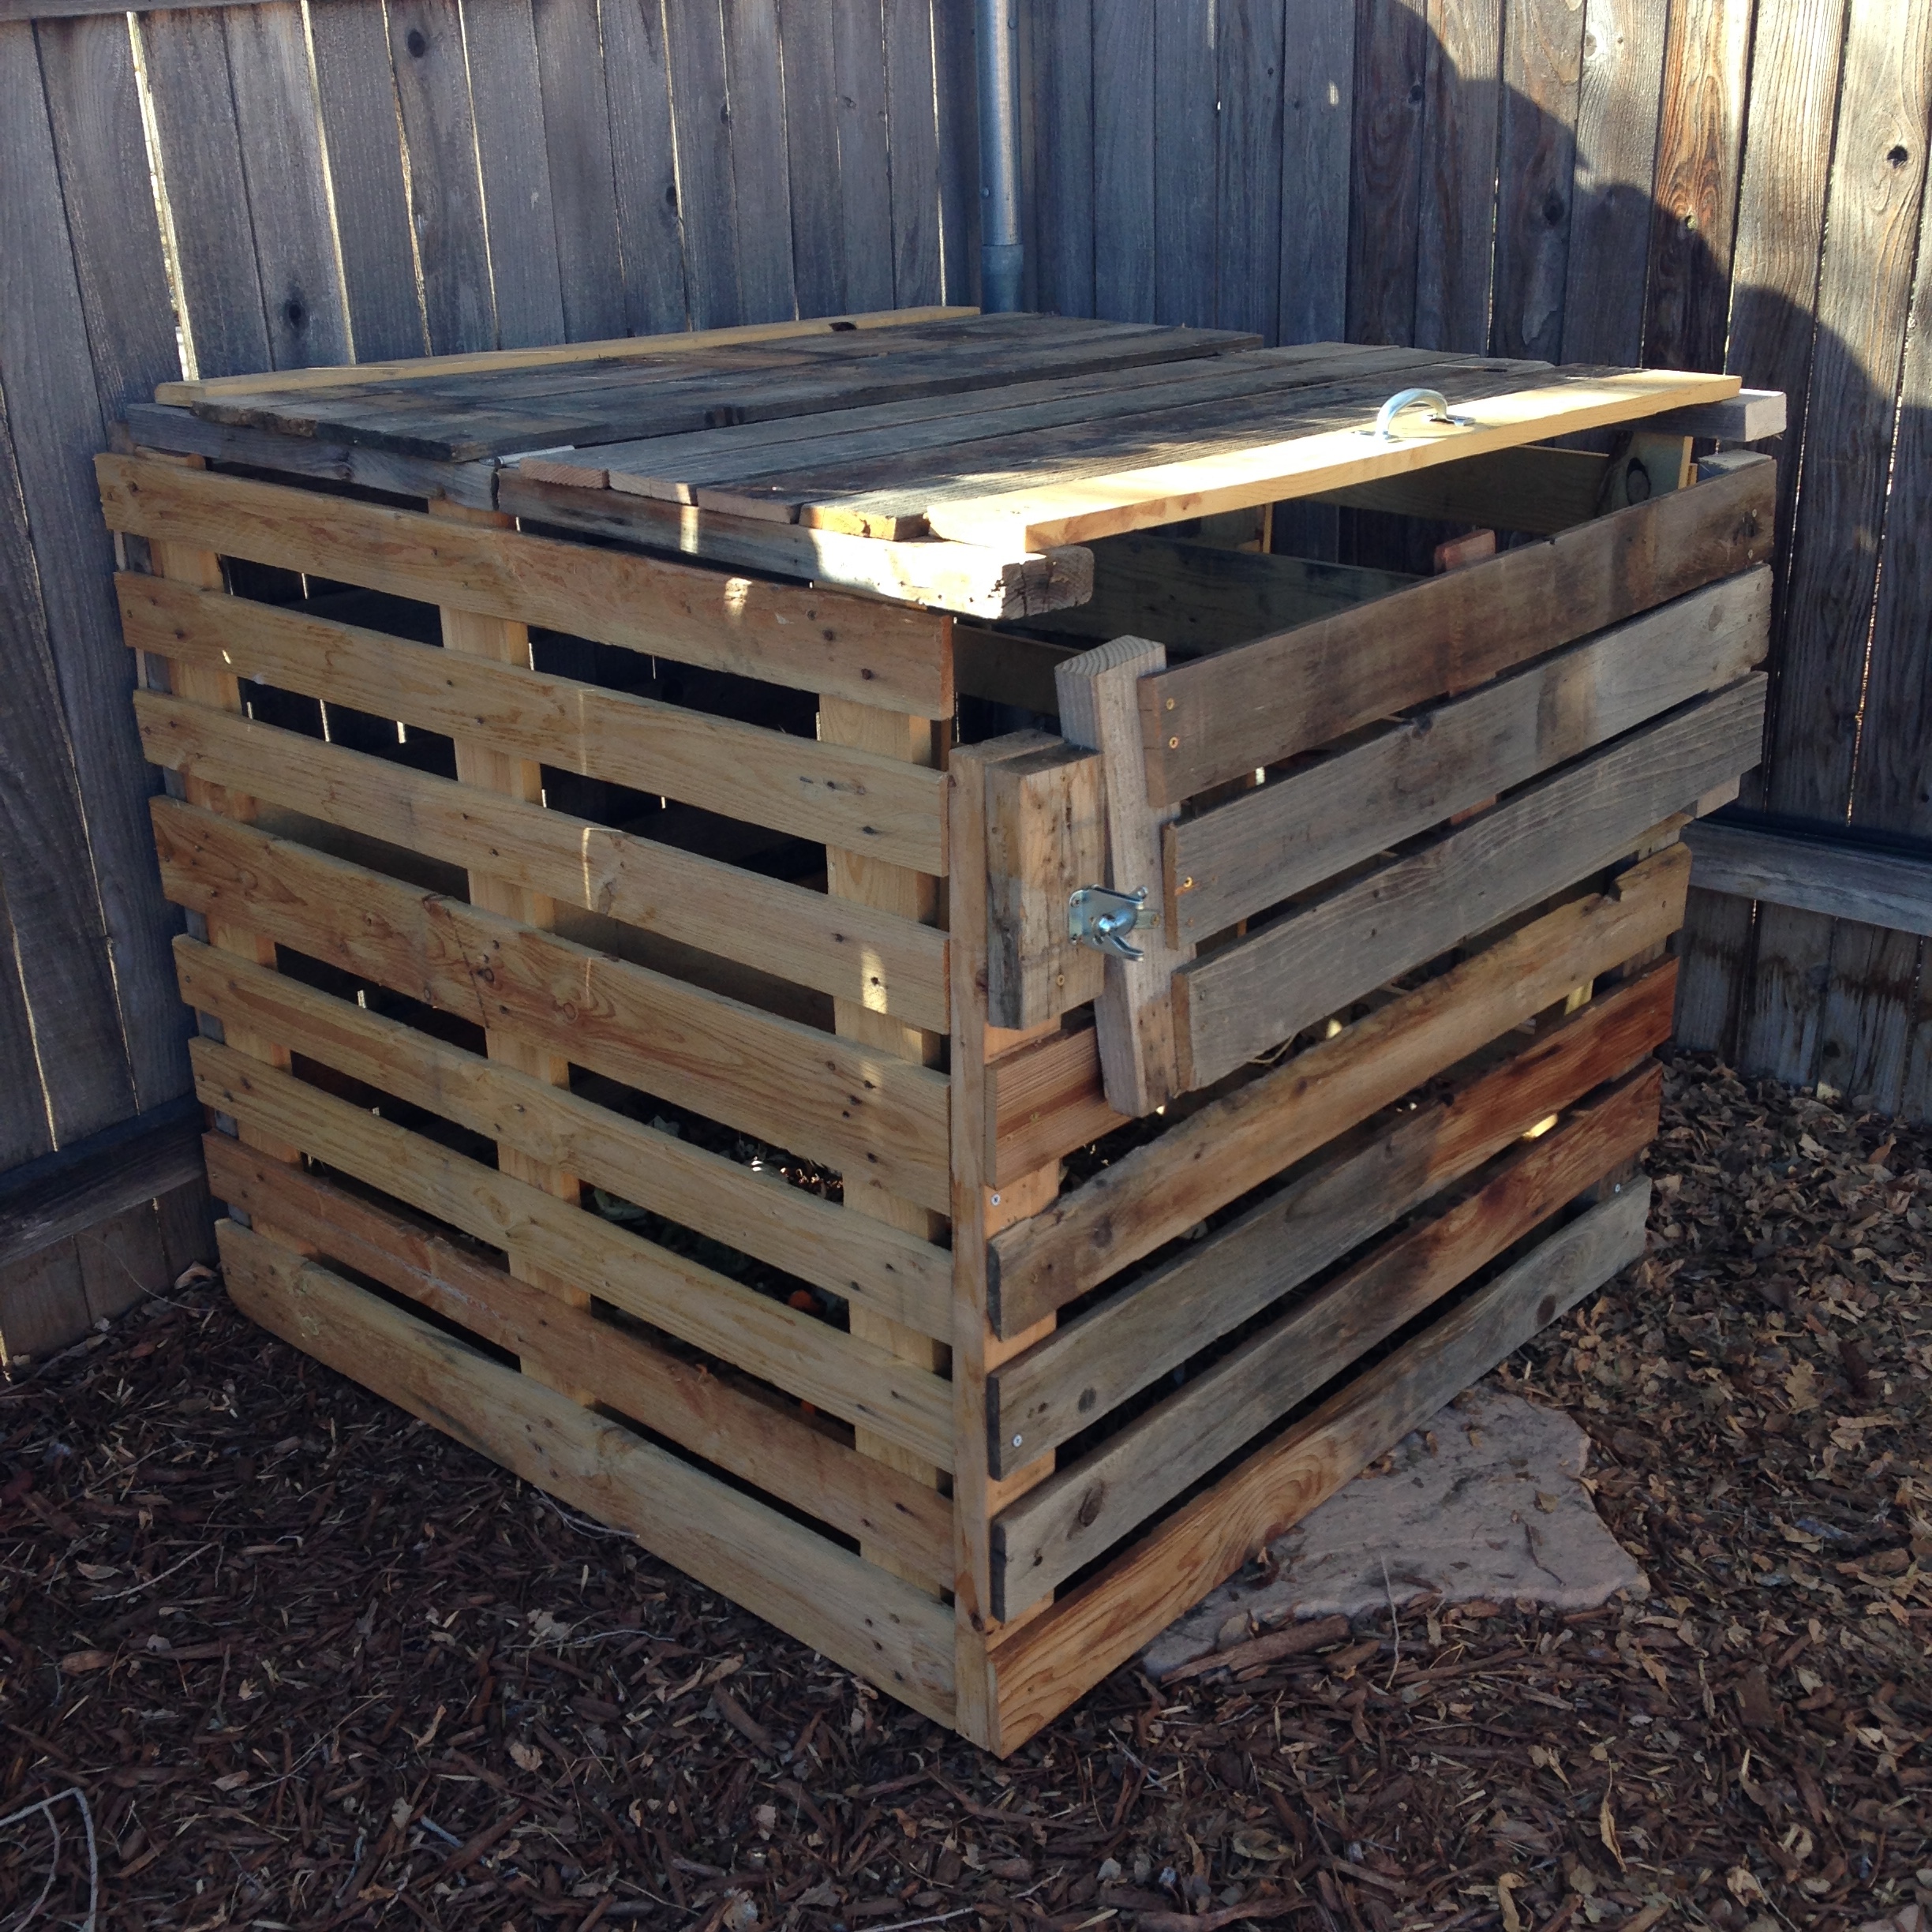
DIY Backyard Compost Bin

I am so extremely excited about this, my friends. I've been wanting to build myself a compost bin for years now!  Finally in November I moved into a house where I could feasible have one in the backyard.  But with moving and the holidays, etc. I just didn't get it done.

However, on Thursday I spent basically the whole day working on this, and I'm super happy with the way it came out. 

Materials

Wood: I was able to use two pallets that my roommate picked up for free from a local brewery, along with a bunch of old fence planks we had from re-doing the fence. This means that all of my wood was free!

If you don't have spare wood handy, you could definitely do this with 4-5 pallets, ideally all the same size.

Hardware

  1. 2 inch and 4 inch screws
  2. 3 Hinges
  3. 1 metal handle 
  4. 1 fence latch

Tools

  1. Hammer
  2. Drill with appropriate bits
  3. Skill saw*
  4. Miter Saw*

* You could do this project without the saws if you found pallets that were all the same size. Because I was working with many different sizes of wood, the saws were definitely needed!

Execution

I based my design off of This Old House's DIY Compost Bin, and really enjoyed it. Their design was easy to understand, had awesome diagrams, and I could adjust from it pretty simply (I used different measurements).

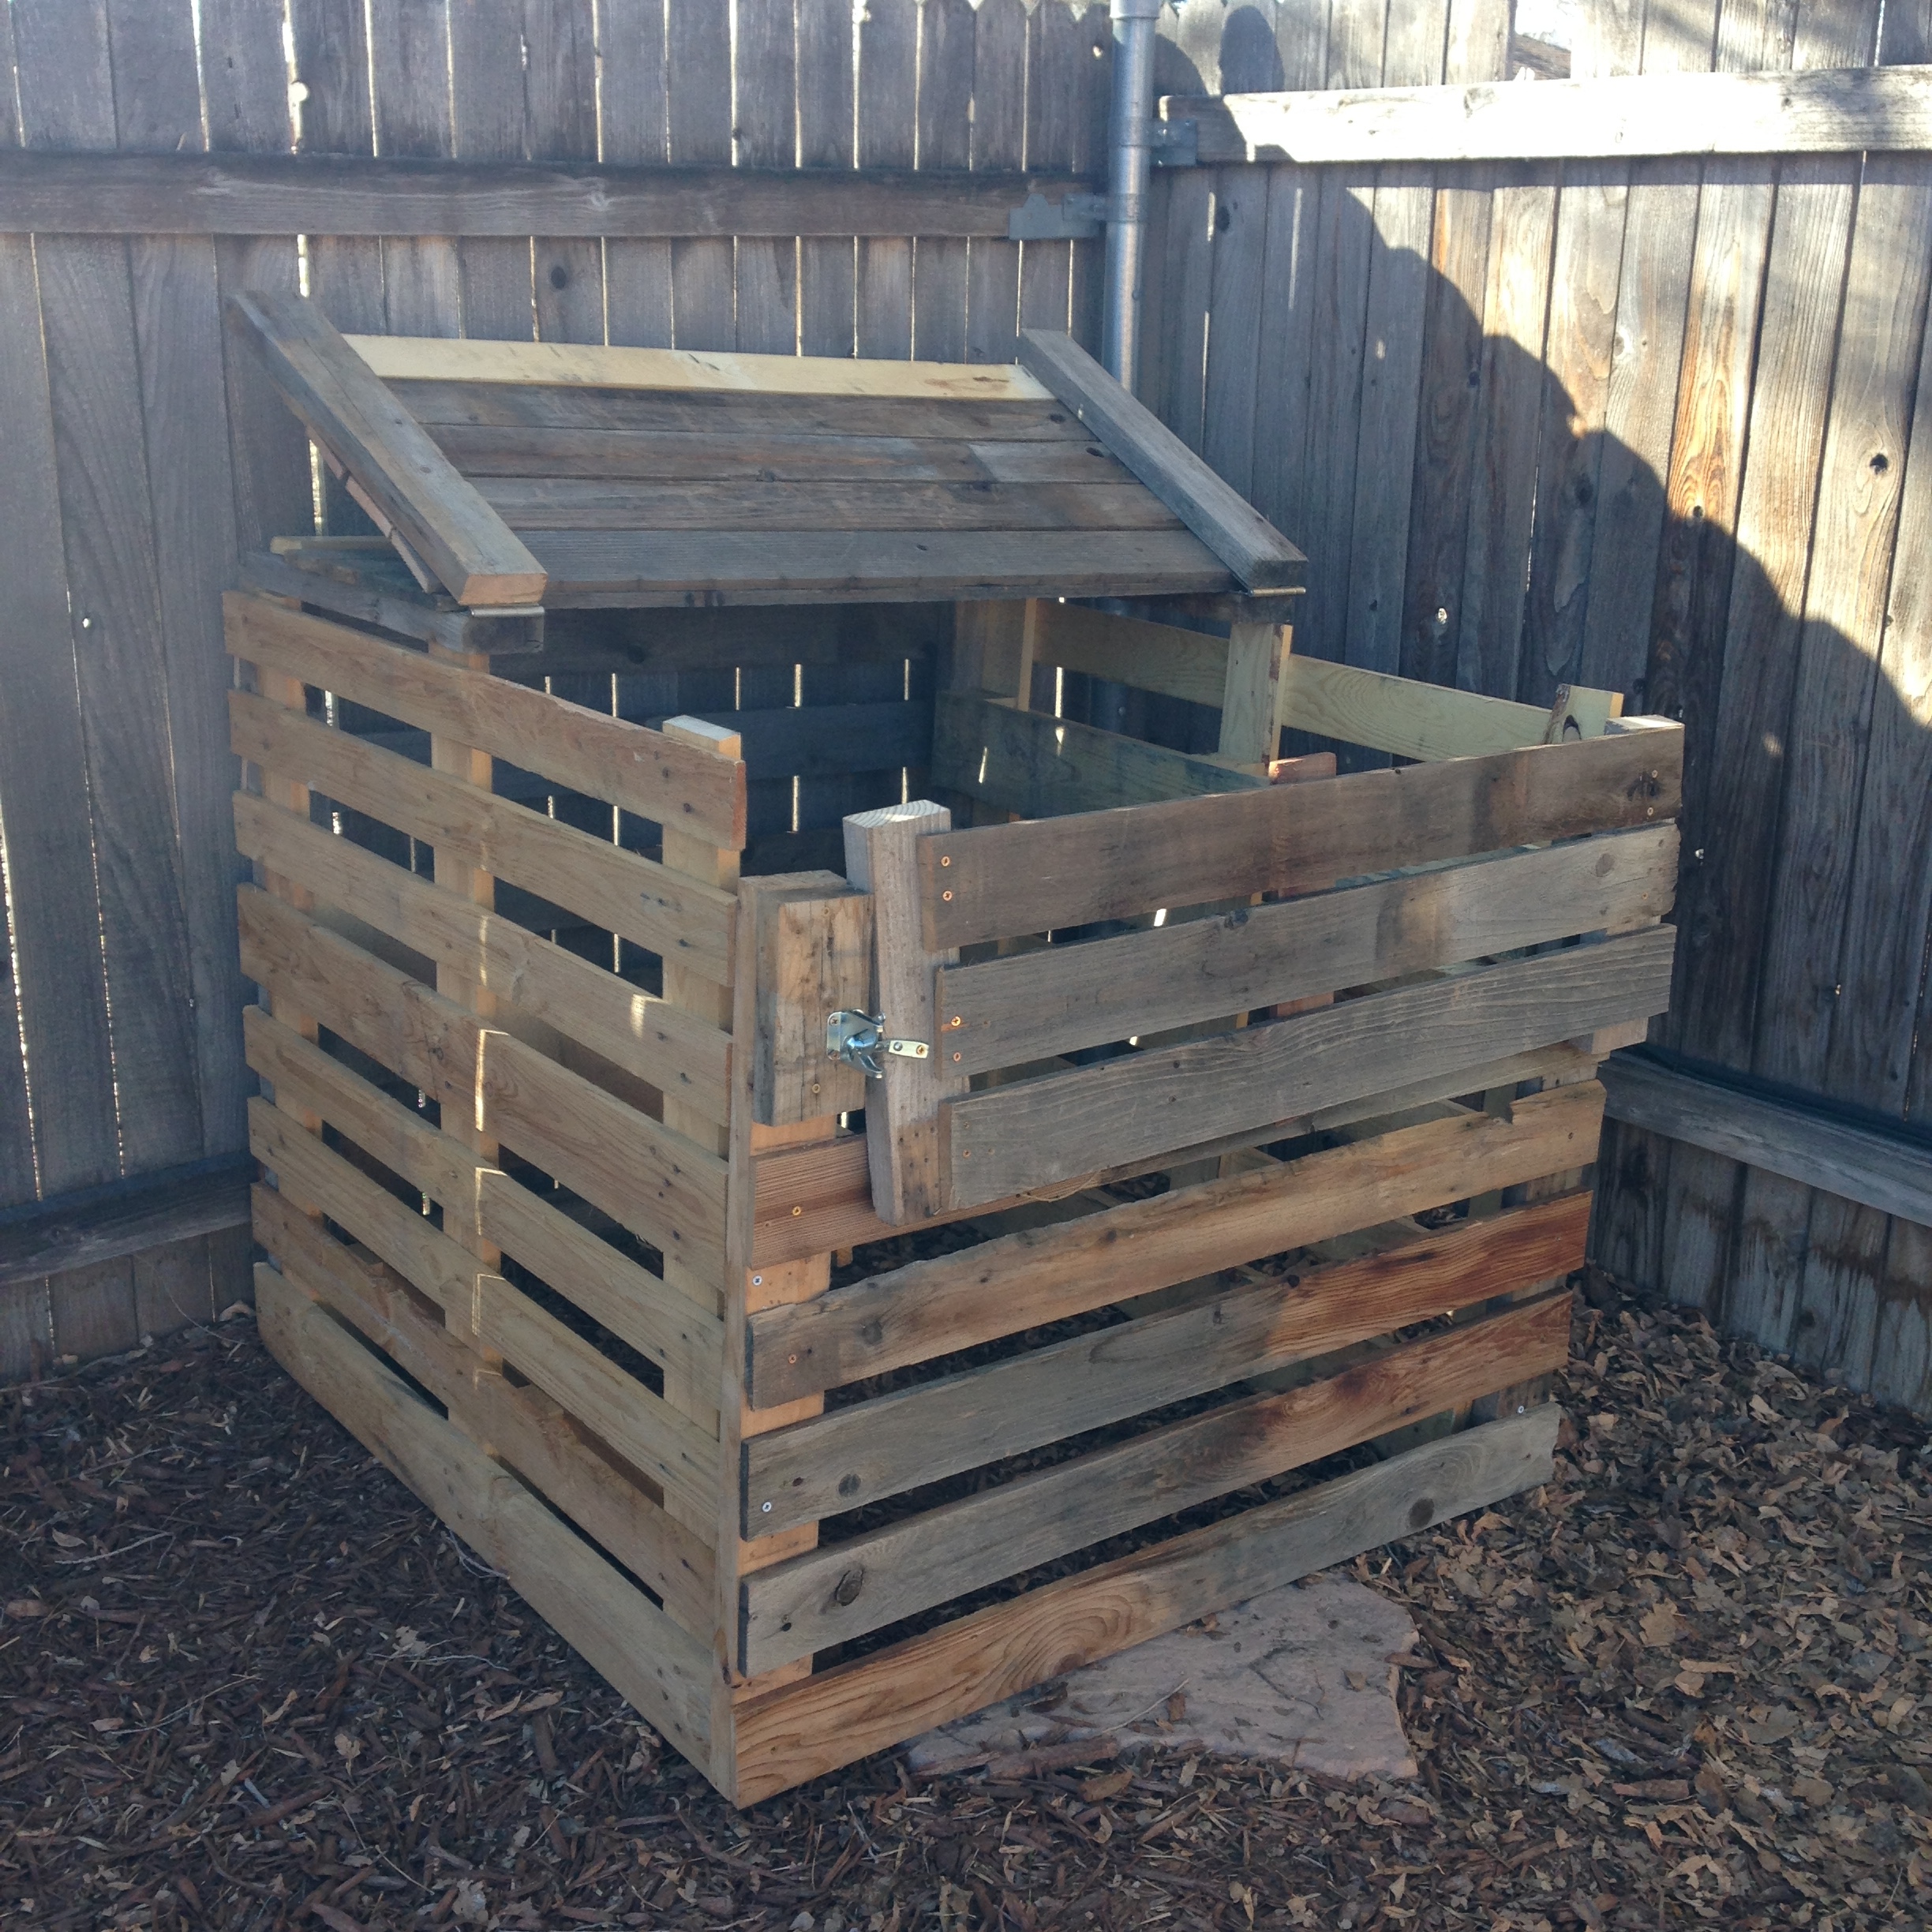
Instead of having a slid-in-slide-out top segment, I made mine hinged. Either way works totally fine!

1. I started out with two sturdy but different sized pallets.

2. I partially broke down and then resized the pallets so that they were both 36" high. I kept their original width of 46" and left the "inner workings"for some extra stability.  This gave me 2 out of 4 sides

3. I made one more 36"x 46" side using two vertical planks (36") and six horizontal ones (46").

4. I brought these three sides to the location where I wanted to assemble/keep the compost bin.

5. Then I attach the three side walls at two corners.

6. Making the front involved making a fixed lower segment and a hinged top segment.

7. For the fixed lower portion I made a 25"x"46" wall just like I made the sides (only shorter), by attaching 5 horizontal planks to two vertical ones. 

5. I attached this to the empty front portion of the bin.

6. Then, I measured to determine the dimensions of my hinged segment (14" tall x 41" wide)

7.  Made hinged section using three vertical planks and three horizontal.

8.  Attached hinge and latch.

9. To make the lid I needed two segments each 23"x46" so I could attach them with a hinge in the middle.

10. I attached these using two hinges, one on each side, and added a handle for easy opening and closing.

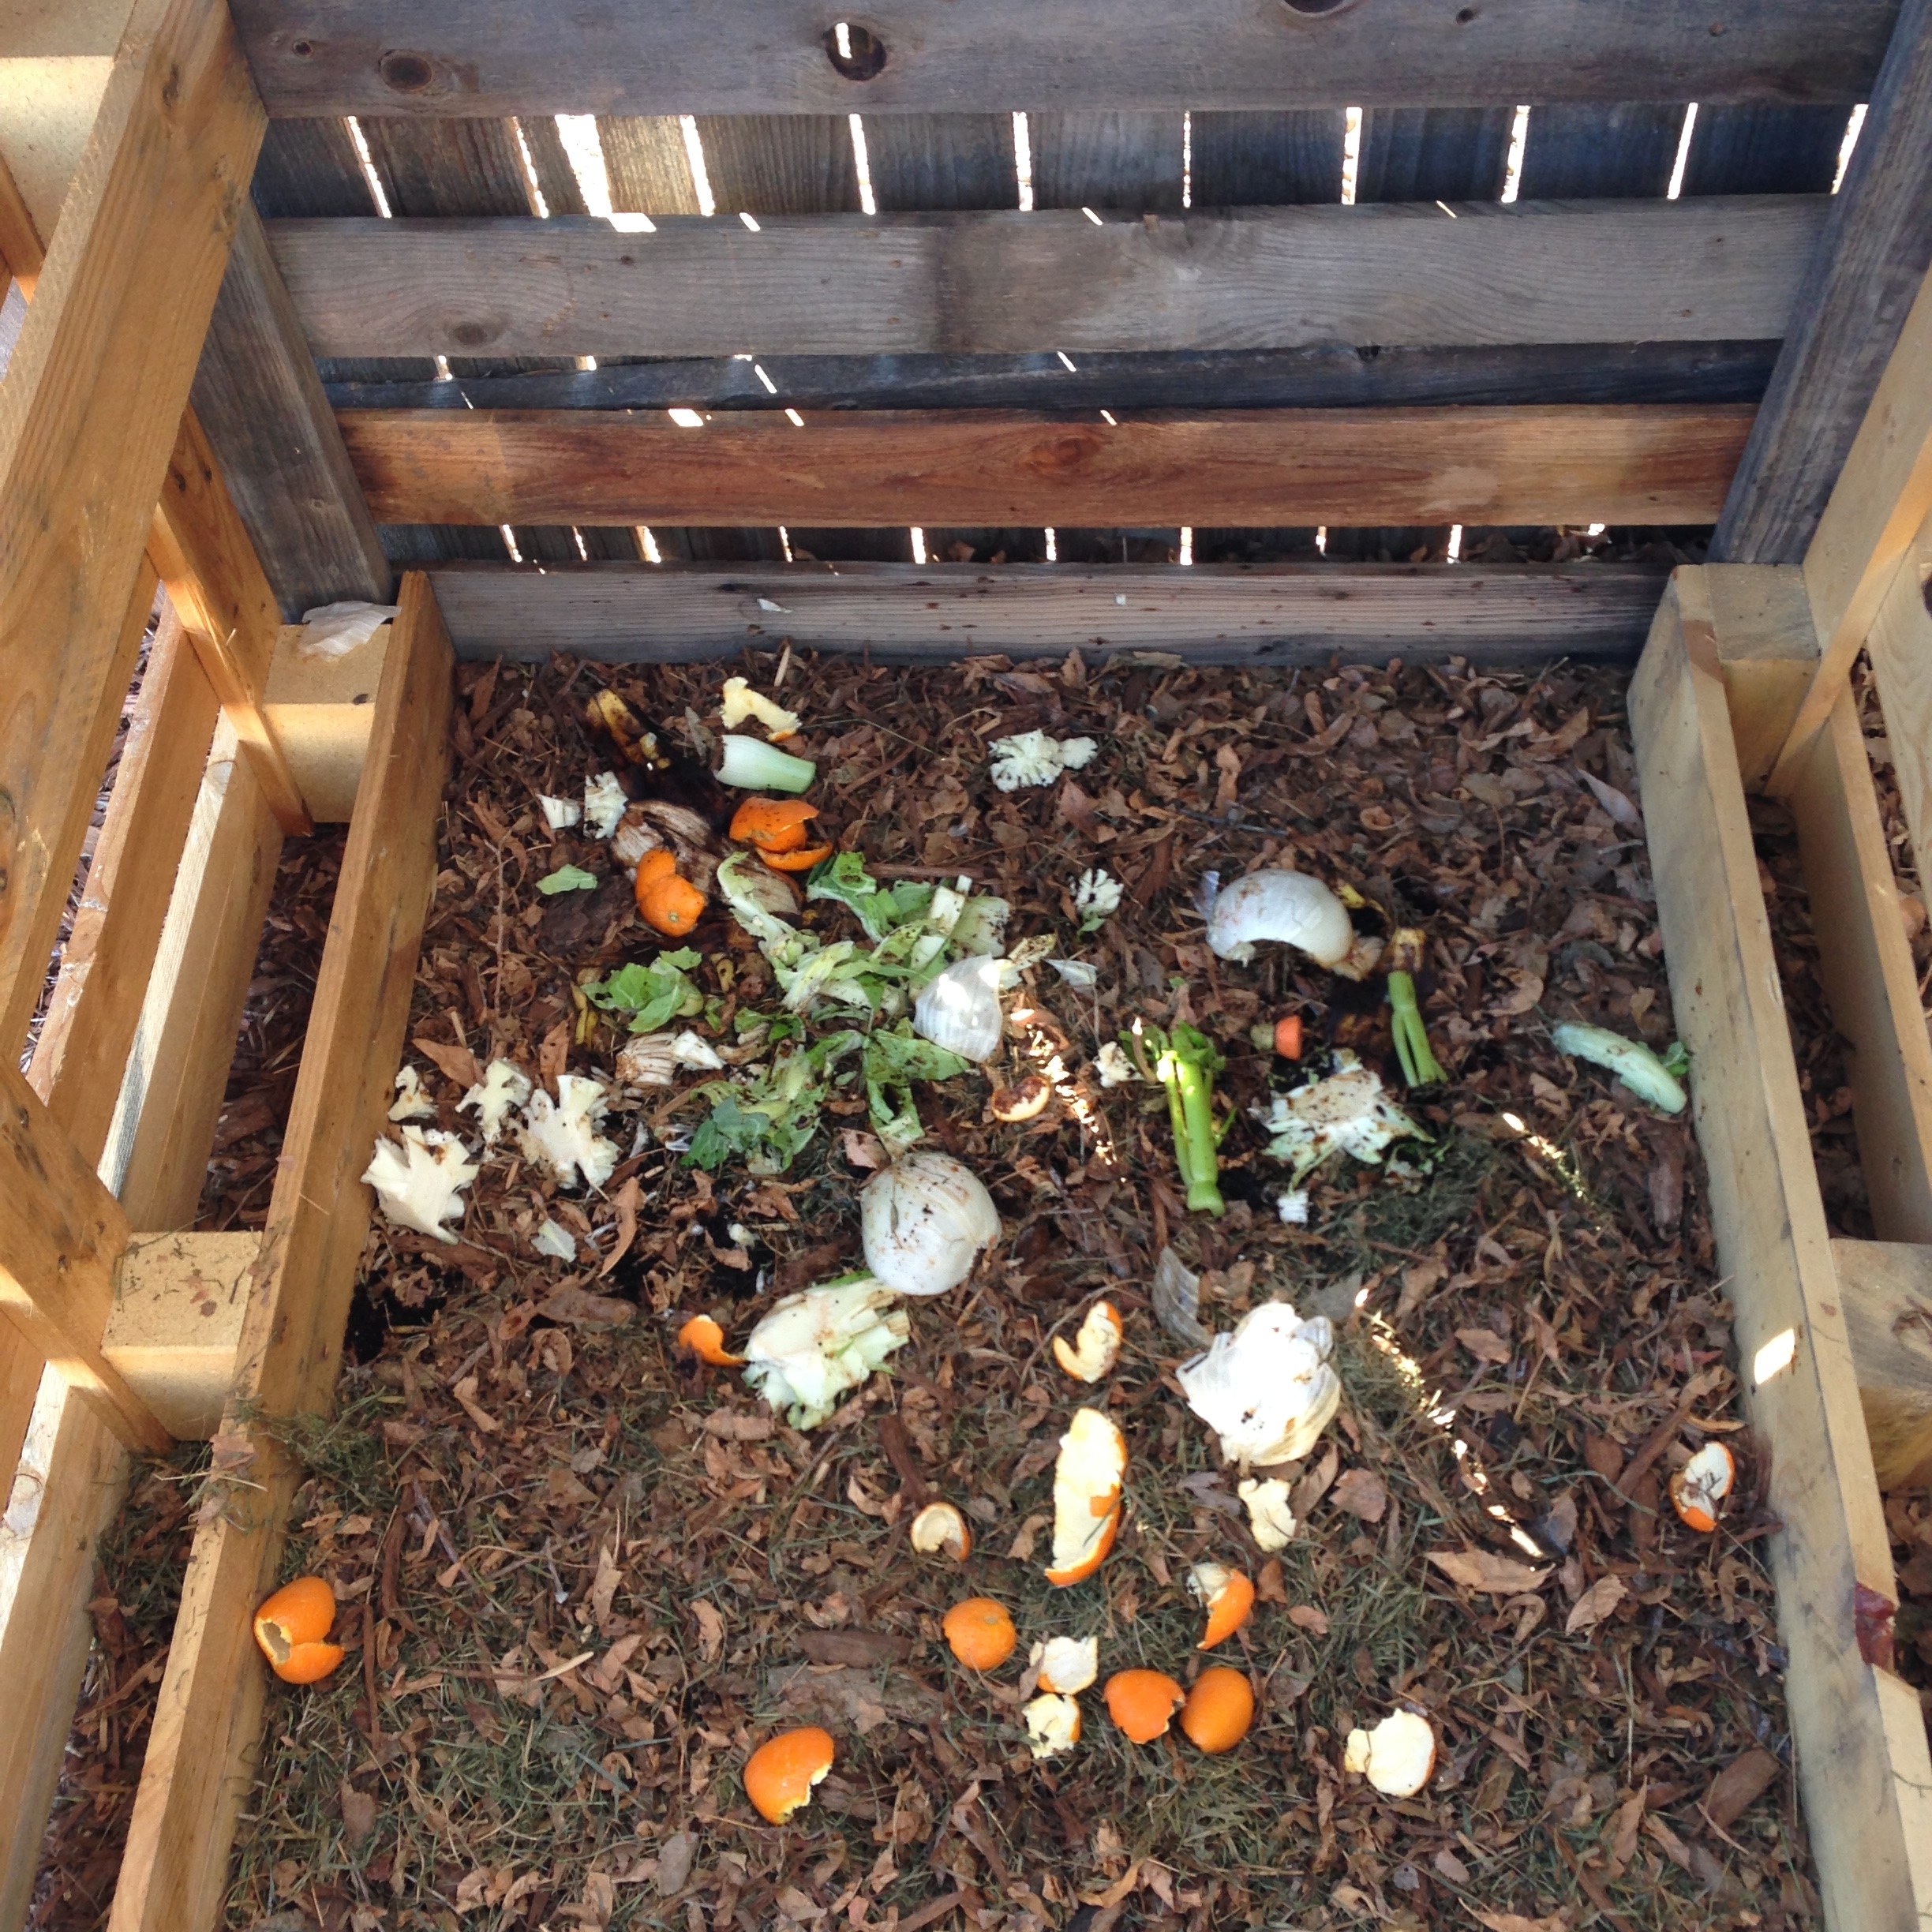
And that was it! Once I was done I threw in some dead leaves and lawn clippings we still had in a pile from fall.  Then in goes the rest of our stuff! I'll do another post in the future about how to compost correctly.

To be frank this project took me a while as I sort of fumbled my way through re-designing and re-doing several steps.  I'd say it took about 5 hours total, but if I had planned and prepped better it could have been about 3 instead.

Cost

Okay, so you're average retail compost bin will cost you between about $50.00-$150.00. A comparable bin to the one I made would be minimally $100.  

My materials and cost was:

  • Wood: $0.00
  • Screws: $10.00 (for 1 lb, I did not use them all)
  • Hinges x 3: $8.00
  • Handle x 1: $3.50 
  • Latches x 1: $4.00

Total Cost: $25.50

Alternate Options

If you are interested in building you're own compost bin and have a backyard to do so, these designs are also awesome:

  1. How to build a compost bin from pallets
  2. How to build a compost bin from cedar lattices 
  3. Easy, square, wood and wire compost bin
  4. Simple wood and wire compost bin

If you are interested in composting but do not have the backyard to do so, here are some indoor composting options:

  1. Under the sink
  2. Retail option

Coconut Oil as Lotion

pexels-photo-531996.jpeg

The two places I've lived for most of my life are Southern California and Colorado and if you've ever been to either of these states, you know that your skin needs loads of extra help because it is dry, dry, dry! This means in both summer and winter, some sort of moisturizer is a must. 

You may have noticed that I use coconut oil for almost everything body related.  But the first thing I used it for, other than for cooking, was lotion!  I discovered this in college and have been waffling back and forth between natural lotion and coconut oil since. But now I'm committing to the option that doesn't come in a plastic bottle or take a multitude of ingredients to make: coconut oil.

Using coconut oil

So, if you want, you can just scoop coconut oil out of the jar it comes in and put it directly on your skin, I have done this many times and still do quite frequently.  It smells nice and is super effective.

The following is basically making it into a scented mousse-type lotion and is about as simple as it gets for a homemade body product.

This shouldn't take you longer than 5 min!

Ingredients / Supplies

  1. Coconut Oil
  2. Essential oil of your choice (optional)
    • I recommend lavender, eucalyptus, rosemary, or whatever floats your boat
  3. 1 small jar, clean and dry

Instructions

  1. Scoop the appropriate amount of coconut oil for the jar you're going to put it in and place it in a bowl.
  2. Mix/whip the coconut oil with a fork until it has more of a mousse-like texture.
  3. Add about 3-6 drops of essential oil per 1 oz of coconut oil and whip again until fully mixed.
    • My jar is about 4 oz and I add 15-20 drops to it.
  4. Put your awesomely scented and whipped coconut oil in your jar, and that's it!

To use: apply it the same way you would regular lotion! I use coconut oil both on my face and body.

Variations

Some people prefer the coconut oil to be a bit harder/more compact as opposed to the whipped texture like I do. If you are this way, or think you may be this way here is your solution:

Simply put the coconut oil in a small pot over low heat until it melts.  Pour it into your jar (make sure its not too hot!) and then mix in your essential oils.  The coconut oil will mold perfectly to the jar and come out less light and fluffy.  Use the exact same way as above.

DIY Vanilla, Lavender, and Ginger Extracts

DSC_0753.JPG

Even before I went zero waste, I had a moment this Fall where I needed to buy vanilla extract for baking and just felt like I was WAY over paying for this teeny tiny bottle. Especially when the ingredients themselves were not actually expensive.  I could put a vanilla bean into alcohol and water, after all!

So I got experimental, with some guidance.  Once I decided to make one extract, I figured I'd just go for it with a few more since there would be leftover vodka (terrible, terrible vodka).

Ingredients

  1. 2/3 cups Dried lavender 
    • To buy: you can generally find it at bulk food stores, tea stores, or online.  For online purchasing recommend Victor's LavenderSan Francisco Herb Company, or Amazon.
    • Packaging: If you order online, though, you will probably get it in a ziplock bag. Many local stores will let you bring your own bag or jar.
  2. 3 Vanilla Bean Pods
    • To buy: I bought mine from my local Savory Spice, but you can also get them from Beanilla and Amazon.
    • Packaging: Savory Spice gave me the beans wrapped in foil, whereas many online stores will give them to you wrapped in plastic.
  3. 1/3 cup (45-50 g) peeled an chopped fresh ginger root
    • To buy: go to your local grocery store's produce section, ginger is relatively inexpensive!
  4. About 2 cups Vodka for each extract
    • To buy: The good news is you can use the cheapest vodka on the market for your extracts!  I got a 1/2 gallon handle of vodka for $11, the cheapest one in the store.  The smell when I opened it made me flashback to being a freshman in college again, but 3 months later I can now say the extracts all came out great!

Vanilla Extract Instructions

  1. Cut the beans once lengthwise. Make any necessary cuts to fit beans into your container.
  2. Put the beans in a clean bottle or jar.
  3. Add vodka
  4. Seal and let sit for 1-2 months.
  5. Invert extract several times a week during this period.
  6. Enjoy your awesome new extract!
  • My favorite use:  All my yummy baked goods!

Lavender Extract Instructions

  1. Measure out lavender
  2. Place lavender in a clean bottle or jar
  3. Add vodka
  4. Seal and let sit for 1-2 months.
  5. Invert extract several times a week during this period.
  6. Experience the glory of having lavender extract in your sweets!
  • My favorite use: adding a little to my vanilla ice cream and melting from happiness!

Note: Lavender extract is more difficult to pour because the flowers float, so I tend to filter most of the out at the end of the process.  The other solution is to put a small piece of fabric over the top of the bottle to filter them when you pour.

Ginger Extract Instructions

  1. Measure out ginger
  2. Place ginger in a clean bottle or jar
  3. Add vodka
  4. Seal and let sit for 1-2 months
  5. Invert extract several times a week during this period
  6. Fall in love with this strong, spicy flavor!
  • My favorite use: Adding a smidge to my chia tea! 

Keep it going

So now that you have some homemade extracts, you're never going to want to buy them again.  I do  a take a little, add a little strategy with extracts.  Once you've used a bit (maybe 1/4-1/3 bottle) add some more vanilla, lavender, ginger, or whatever you're making and add some more vodka.  This way you never really run out.  If your jar starts to get too packed with stuff, take out a bit of the old ingredient before you put some new in.

Price breakdown

Vanilla Extract:

  • 2 cups vodka: about $2.80
  • 3 vanilla beans: $10.95
  • 16 oz homemade cost: about $14
  • Store-bought cost: as low as $27.59 and as high as $55.95
  • Note: the vanilla beans I used are the quality used to make the $55 extract!

Lavender:

  • 2 cups vodka: about $2.80
  • 0.6 oz dried lavender: $1.65
  • 16 oz cost: $4.45
  • store-bought cost: $24.65 to $28.25

Ginger:

  • 2 cups vodka: about $2.80
  • 1/3 cup ginger: about $3.00
  • 16 oz cost: $5.80
  • Store bought cost: $17.65 to $21.85